kubeadm是Kubernetes官方提供的用于快速安部署Kubernetes集群的工具,很适合部署以用于开发和测试目的。
随着CentOS 7在2024年停止支持,CentOS 8在2021年12月31日停止维护(EOL),使用CentOS作为服务器操作系统的需要寻找替代方案,加之目前很多项目对系统国产化的要求,所以今天我们试用一下阿里巴巴的Anolis OS。
Anolis OS的介绍:
龙蜥操作系统(Anolis OS)是基于阿里巴巴十年自研操作系统,大规模实践 CentOS Linux 替换迁移的技术积累和创新。OpenAnolis(龙蜥) 社区成立于 2020 年 9 月,是一个操作系统开源社区及创新平台,由国内、外领先操作系统、芯片、云计算公司共同发起,致力于通过开放的社区合作,构建国内自主Linux 开源发行版及开源创新技术,推动软、硬件及应用生态繁荣发展。
Anolis OS 8 是 OpenAnolis 社区推出的完全开源、中立、开放的发行版,它支持多计算架构,也面向云端场景优化。100% 兼容 CentOS 8 软件生态,能够完美延续 CentOS Linux 停服后的操作系统服务。Anolis OS 采用 Linux kernel 4.18 (简称 RHCK )、gcc 8.3、glibc 2.28 保证了与 RHEL/CentOS 100% 兼容,同时支持由 OpenAnolis Cloud Kenrel SIG 研发的 Linux Kernel 4.19 LTS 提供社区最新创新成果。Anolis OS 8 旨在为广大开发者和运维人员提供稳定、高性能、安全、可靠、开源的操作系统服务。
龙蜥操作系统(Anolis OS)亮点一览:
• 100% 兼容 RHEL/CentOS Linux 8;
• 支持 x86_64 和 aarch64 架构及飞腾、海光、兆芯、鲲鹏等芯片,适配 x86 及 arm64 主流服务器硬件;
• 支持 Linux Kernel 4.19 LTS 版本并同步上游社区最新成果,帮助用户及时获得开源社区创新红利;
• 支持开源分布式关系数据库 OceanBase;
• 支持安全容器 Kata Containers;
• 支持开源云原生关系型数据库 PolarDB for PostgreSQL;
• 基础应用组件升级;Python 3.9/SWIG 4.0/Subversion 1.14/Redis 6/PostgreSQL 13MariaDB 10.5;
• 工具链升级;GCC Toolset 10/LLVM Toolset 11.0.0/Rust Toolset 1.49.0/Go Toolset 1.15.7;
• 提供 CentOS Linux 到 Anolis OS 迁移工具,帮助系统及应用的顺滑迁移;
Anolis OS 8系统的安装和CentOS几乎相同,参考:https://blog.csdn.net/qq_45392321/article/details/127168085
本文使用 kubeadm 在龙蜥(Anolis) OS 8上搭建一个使用 containerd 作为容器运行时的 Kubernetes 集群,k8s安装最新的 v1.27 版本。
环境准备
版本信息
- Anolis OS 8.8GA 64位
- Kubernetes 1.27
机器配置
准备1个master节点和1个node节点,最低配置2核2G,都是Anolis OS 8.8GA 系统,内核是5.10.134-13.an8.x86_64,在每个节点上添加 hosts 信息:
➜  ~ cat /etc/hosts
10.69.10.110 k8s.master01
10.69.10.111 k8s.node01
系统优化
关闭防火墙:
systemctl stop firewalld
systemctl disable firewalld
禁用 SELINUX:
➜  ~ setenforce 0
➜  ~ cat /etc/selinux/config
SELINUX=disabled
关闭 swap 分区:
swapoff -a
# 修改 /etc/fstab文件,注释掉 SWAP 的自动挂载
#/dev/mapper/ao-swap     none                    swap    defaults        0 0
# 使用 free -m 确认 swap 已经关闭
➜  ~ free -m
              total        used        free      shared  buff/cache   available
Mem:           1937         158        1490           8         288        1627
Swap:             0           0           0
配置ulimit
➜  ~ ulimit -SHn 65535
➜  ~ cat >> /etc/security/limits.conf <<EOF
* soft nofile 655360
* hard nofile 131072
* soft nproc 655350
* hard nproc 655350
* soft memlock unlimited
* hard memlock unlimited
EOF
加载相关内核模块
➜  ~ cat /etc/sysconfig/modules/br_netfilter.modules
modprobe br_netfilter
➜  ~ cat /etc/sysconfig/modules/ipvs.modules
#!/bin/bash
modprobe -- ip_vs
modprobe -- ip_vs_rr
modprobe -- ip_vs_wrr
modprobe -- ip_vs_sh
modprobe -- nf_conntrack
➜  ~ chmod 755 /etc/sysconfig/modules/br_netfilter.modules
➜  ~ chmod 755 /etc/sysconfig/modules/ipvs.modules
➜  ~ bash /etc/sysconfig/modules/br_netfilter.modules
➜  ~ bash /etc/sysconfig/modules/ipvs.modules
# 验证是否已经正确加载所需的内核模块
➜  ~ lsmod | grep -e ip_vs -e nf_conntrack
ip_vs_sh               16384  0
ip_vs_wrr              16384  0
ip_vs_rr               16384  0
ip_vs                 180224  6 ip_vs_rr,ip_vs_sh,ip_vs_wrr
nf_conntrack          172032  1 ip_vs
nf_defrag_ipv6         24576  2 nf_conntrack,ip_vs
nf_defrag_ipv4         16384  1 nf_conntrack
libcrc32c              16384  2 nf_conntrack,ip_vs
配置sysctl
➜  ~ cat <<EOF > /etc/sysctl.d/k8s.conf
net.ipv4.ip_forward = 1
net.bridge.bridge-nf-call-iptables = 1
net.bridge.bridge-nf-call-ip6tables = 1
fs.may_detach_mounts = 1
vm.overcommit_memory=1
vm.panic_on_oom=0
fs.inotify.max_user_watches=89100
fs.file-max=52706963
fs.nr_open=52706963
net.netfilter.nf_conntrack_max=2310720

net.ipv4.tcp_keepalive_time = 600
net.ipv4.tcp_keepalive_probes = 10
net.ipv4.tcp_keepalive_intvl = 30
net.ipv4.tcp_max_tw_buckets = 36000
net.ipv4.tcp_tw_reuse = 1
net.ipv4.tcp_max_orphans = 327680
net.ipv4.tcp_orphan_retries = 3
net.ipv4.tcp_syncookies = 1
net.ipv4.tcp_max_syn_backlog = 16384
net.ipv4.ip_conntrack_max = 65536
net.ipv4.tcp_max_syn_backlog = 16384
net.ipv4.tcp_timestamps = 0
net.core.somaxconn = 16384

net.ipv6.conf.all.disable_ipv6 = 0
net.ipv6.conf.default.disable_ipv6 = 0
net.ipv6.conf.lo.disable_ipv6 = 0
net.ipv6.conf.all.forwarding = 1
vm.swappiness=0
EOF
# 执行如下命令使修改生效:
➜  ~ sysctl --system
安装 ipset 软件包、管理工具 ipvsadm:
➜ ~ yum install ipvsadm ipset sysstat conntrack libseccomp
同步服务器时间
➜  ~ yum install chrony -y
➜  ~ systemctl enable chronyd
➜  ~ systemctl start chronyd
➜  ~ chronyc sources
MS Name/IP address         Stratum Poll Reach LastRx Last sample
===============================================================================
^* 203.107.6.88                  2   6   377    61   -710us[ -448us] +/-   21ms
➜  ~ date
2023-07-20 17:09:37 Thursday +08
安装 Containerd
首先从 release 页面下载最新版本的压缩包并解压到/usr/local。 需要注意cri-containerd-(cni-)-VERSION-OS-ARCH.tar.gz发行包自containerd 1.6版本起已经被弃用,在某些 Linux 发行版上无法正常工作,并将在containerd 2.0版本中移除,所以我们使用标准的containerd---.tar.gz发行包,当前最新为 1.7.2 版本:
➜  ~ wget https://github.com/containerd/containerd/releases/download/v1.7.2/containerd-1.7.2-linux-amd64.tar.gz
➜  ~ tar Cxzvf /usr/local containerd-1.7.2-linux-amd64.tar.gz
containerd 的默认配置文件为 /etc/containerd/config.toml,我们可以通过如下所示的命令生成一个默认的配置:
➜  ~ mkdir /etc/containerd
➜  ~ containerd config default > /etc/containerd/config.toml
将 containerd 的 cgroup driver 配置为 systemd,修改config.toml将 SystemdCgroup 设置为 true:
➜  ~ vim /etc/containerd/config.toml
[plugins."io.containerd.grpc.v1.cri".containerd.runtimes.runc]
  ...
  [plugins."io.containerd.grpc.v1.cri".containerd.runtimes.runc.options]
    SystemdCgroup = true
    ....
拉取containerd的systemd service文件:
➜ ~ wget https://raw.githubusercontent.com/containerd/containerd/main/containerd.service -O /etc/systemd/system/containerd.service
安装runc:
➜  ~ wget https://github.com/opencontainers/runc/releases/latest/download/runc.amd64 -O /usr/local/sbin/runc
➜  ~ chmod +x /usr/local/sbin/runc
安装CNI插件:
➜  ~ mkdir -p /usr/local/containerd/cni/
➜  ~ wget https://github.com/containernetworking/plugins/releases/download/v1.3.0/cni-plugins-linux-amd64-v1.3.0.tgz
➜  ~ tar Cxzvf /usr/local/containerd/cni/ cni-plugins-linux-amd64-v1.3.0.tgz
安装nerdctl:
➜  ~ mkdir -p /usr/local/containerd/bin/
➜  ~ wget https://github.com/containerd/nerdctl/releases/download/v1.4.0/nerdctl-1.4.0-linux-amd64.tar.gz
➜  ~ tar zxvf nerdctl-1.4.0-linux-amd64.tar.gz
➜  ~ mv nerdctl /usr/local/containerd/bin/
➜  ~ ln -s /usr/local/containerd/bin/nerdctl /usr/local/bin/nerdctl
安装buildkit:
➜  ~ wget https://github.com/moby/buildkit/releases/download/v0.12.0/buildkit-v0.12.0.linux-amd64.tar.gz
➜  ~ tar -zxvf buildkit-v0.12.0.linux-amd64.tar.gz -C /usr/local/containerd/
➜  ~ ln -s /usr/local/containerd/bin/buildkitd /usr/local/bin/buildkitd
➜  ~ ln -s /usr/local/containerd/bin/buildctl /usr/local/bin/buildctl
安装
➜  ~ wget https://github.com/kubernetes-sigs/cri-tools/releases/download/v1.27.1/crictl-v1.27.1-linux-amd64.tar.gz
➜  ~ tar -zxvf crictl-v*-linux-amd64.tar.gz -C /usr/local/containerd/
➜  ~ ln -s /usr/local/containerd/crictl /usr/local/bin/crictl
➜  ~ cat > /etc/crictl.yaml <<EOF
runtime-endpoint: unix:///run/containerd/containerd.sock
image-endpoint: unix:///run/containerd/containerd.sock
timeout: 10
debug: false
EOF
启动 containerd:
➜  ~ systemctl daemon-reload
➜  ~ systemctl enable containerd --now
启动完成后使用 containerd 的本地 CLI 工具查看版本::
➜  ~ ctr version
Client:
  Version:  v1.7.2
  Revision: 0cae528dd6cb557f7201036e9f43420650207b58
  Go version: go1.20.4

Server:
  Version:  v1.7.2
  Revision: 0cae528dd6cb557f7201036e9f43420650207b58
  UUID: e048e6c2-b459-4152-bed1-9679de98d00a

➜  ~ nerdctl version
Client:
 Version:	v1.4.0
 OS/Arch:	linux/amd64
 Git commit:	7e8114a82da342cdbec9a518c5c6a1cce58105e9
 buildctl:
  Version:	v0.12.0
  GitCommit:	18fc875d9bfd6e065cd8211abc639434ba65aa56

Server:
 containerd:
  Version:	v1.7.2
  GitCommit:	0cae528dd6cb557f7201036e9f43420650207b58
 runc:
  Version:	1.1.8
  GitCommit:	v1.1.8-0-g82f18fe0

➜  ~ crictl info
{
  "status": {
    "conditions": [
      {
        "type": "RuntimeReady",
        "status": true,
        "reason": "",
        "message": ""
      },
      {
        "type": "NetworkReady",
        "status": false,
        "reason": "NetworkPluginNotReady",
        "message": "Network plugin returns error: cni plugin not initialized"
      }
    ]
  },
  "cniconfig": {
    "PluginDirs": [
      "/opt/cni/bin"
    ],
    "PluginConfDir": "/etc/cni/net.d",
    "PluginMaxConfNum": 1,
    "Prefix": "eth",
    .................
使用 kubeadm 部署 Kubernetes
配置kubernetes安装源,因为kubernetes并未提供CentOS 8的安装包,所以我们仍然使用CentOS 7 的安装源,实测可正常使用。官方(国外)源:
➜  ~ cat > /etc/yum.repos.d/kubernetes.repo <<EOF
[kubernetes]
name=Kubernetes
baseurl=https://packages.cloud.google.com/yum/repos/kubernetes-el7-\$basearch/
enabled=1
gpgcheck=1
repo_gpgcheck=1
gpgkey=https://packages.cloud.google.com/yum/doc/yum-key.gpg
        https://packages.cloud.google.com/yum/doc/rpm-package-key.gpg
EOF
阿里云(国内)源:
➜  ~ cat > /etc/yum.repos.d/kubernetes.repo <<EOF
[kubernetes]
name=Kubernetes
baseurl=http://mirrors.aliyun.com/kubernetes/yum/repos/kubernetes-el7-\$basearch/
enabled=1
gpgcheck=0
repo_gpgcheck=0
gpgkey=http://mirrors.aliyun.com/kubernetes/yum/doc/yum-key.gpg
        http://mirrors.aliyun.com/kubernetes/yum/doc/rpm-package-key.gpg
EOF
安装 kubeadm、kubelet、kubectl,当前最新版本是1.27.4:
➜  ~ yum makecache
➜  ~ export K8S_VERSION=1.27.4
➜  ~ yum install -y kubectl-$K8S_VERSION kubelet-$K8S_VERSION kubeadm-$K8S_VERSION --disableexcludes=kubernetes
➜  ~ systemctl enable --now kubelet
➜  ~ kubeadm version
配置NetworkManager
NetworkManager的默认操作会干扰 Calico 代理正确路由的能力。在以下位置创建配置文件 /etc/NetworkManager/conf.d/calico.conf阻止 NetworkManager 干扰接口:
➜  ~ cat > /etc/NetworkManager/conf.d/calico.conf <<EOF
[keyfile]
unmanaged-devices=interface-name:cali*;interface-name:tunl*;interface-name:vxlan.calico;interface-name:vxlan-v6.calico;interface-name:wireguard.cali;interface-name:wg-v6.cali
EOF
➜  ~ systemctl restart NetworkManager
为了避免在初始化的preflight阶段出现警告提示[WARNING FileExisting-tc]: tc not found in system path,安装iproute-tc:
dnf install iproute-tc
以上的操作需在所有节点执行。
初始化集群
在 master 节点上输出集群初始化默认使用的配置:
➜ ~ kubeadm config print init-defaults --component-configs KubeletConfiguration > kubeadm.yaml
根据需求修改配置,如修改kube-proxy 的模式为 ipvs,将 networking.podSubnet 设置为 10.244.0.0/16:
➜  ~ cat kubeadm.yaml
apiVersion: kubeadm.k8s.io/v1beta3
bootstrapTokens:
- groups:
  - system:bootstrappers:kubeadm:default-node-token
  token: webmas.terme01234567890 # 默认的节点token,按需修改
  ttl: 24h0m0s
  usages:
  - signing
  - authentication
kind: InitConfiguration
localAPIEndpoint:
  advertiseAddress: 10.69.10.110 # 指定master节点内网IP
  bindPort: 6443
nodeRegistration:
  criSocket: unix:///var/run/containerd/containerd.sock
  imagePullPolicy: IfNotPresent
  name: k8s.master01    # master节点的hostname
  taints: null
---
apiServer:
  timeoutForControlPlane: 4m0s
apiVersion: kubeadm.k8s.io/v1beta3
certificatesDir: /etc/kubernetes/pki
clusterName: kubernetes
controllerManager: {}
dns: {}
etcd:
  local:
    dataDir: /var/lib/etcd
imageRepository: registry.k8s.io
kind: ClusterConfiguration
kubernetesVersion: 1.27.0
networking:
  dnsDomain: cluster.local
  serviceSubnet: 10.96.0.0/12
  podSubnet: 10.244.0.0/16 # 指定 pod 子网
scheduler: {}
---
apiVersion: kubelet.config.k8s.io/v1beta1
authentication:
  anonymous:
    enabled: false
  webhook:
    cacheTTL: 0s
    enabled: true
  x509:
    clientCAFile: /etc/kubernetes/pki/ca.crt
authorization:
  mode: Webhook
  webhook:
    cacheAuthorizedTTL: 0s
    cacheUnauthorizedTTL: 0s
cgroupDriver: systemd
clusterDNS:
- 10.96.0.10
clusterDomain: cluster.local
containerRuntimeEndpoint: ""
cpuManagerReconcilePeriod: 0s
evictionPressureTransitionPeriod: 0s
fileCheckFrequency: 0s
healthzBindAddress: 127.0.0.1
healthzPort: 10248
httpCheckFrequency: 0s
imageMinimumGCAge: 0s
kind: KubeletConfiguration
logging:
  flushFrequency: 0
  options:
    json:
      infoBufferSize: "0"
  verbosity: 0
memorySwap: {}
nodeStatusReportFrequency: 0s
nodeStatusUpdateFrequency: 0s
rotateCertificates: true
runtimeRequestTimeout: 0s
shutdownGracePeriod: 0s
shutdownGracePeriodCriticalPods: 0s
staticPodPath: /etc/kubernetes/manifests
streamingConnectionIdleTimeout: 0s
syncFrequency: 0s
volumeStatsAggPeriod: 0s
---
apiVersion: kubeproxy.config.k8s.io/v1alpha1
kind: KubeProxyConfiguration
mode: ipvs # 指定kube-proxy 模式
这里criSocket设置了容器运行时为containerd,同时设置kubelet的cgroupDriver为systemd,设置kube-proxy代理模式为ipvs。更多配置选项文档参看:https://godoc.org/k8s.io/kubernetes/cmd/kubeadm/app/apis/kubeadm/v1beta3
使用上面的配置文件在 master 节点上进行初始化:
# 预先拉取镜像
➜  ~ kubeadm config images pull --config kubeadm.yaml
[config/images] Pulled registry.k8s.io/kube-apiserver:v1.27.0
[config/images] Pulled registry.k8s.io/kube-controller-manager:v1.27.0
[config/images] Pulled registry.k8s.io/kube-scheduler:v1.27.0
[config/images] Pulled registry.k8s.io/kube-proxy:v1.27.0
[config/images] Pulled registry.k8s.io/pause:3.9
[config/images] Pulled registry.k8s.io/etcd:3.5.7-0
[config/images] Pulled registry.k8s.io/coredns/coredns:v1.10.1
# 初始化集群
➜  ~ kubeadm init --config kubeadm.yaml
[init] Using Kubernetes version: v1.27.0
[preflight] Running pre-flight checks
[preflight] Pulling images required for setting up a Kubernetes cluster
[preflight] This might take a minute or two, depending on the speed of your internet connection
[preflight] You can also perform this action in beforehand using 'kubeadm config images pull'
W0728 16:04:52.210102    7730 checks.go:835] detected that the sandbox image "registry.k8s.io/pause:3.8" of the container runtime is inconsistent with that used by kubeadm. It is recommended that using "registry.k8s.io/pause:3.9" as the CRI sandbox image.
[certs] Using certificateDir folder "/etc/kubernetes/pki"
[certs] Generating "ca" certificate and key
[certs] Generating "apiserver" certificate and key
[certs] apiserver serving cert is signed for DNS names [k8s.master01 kubernetes kubernetes.default kubernetes.default.svc kubernetes.default.svc.cluster.local] and IPs [10.96.0.1 10.69.10.110]
[certs] Generating "apiserver-kubelet-client" certificate and key
[certs] Generating "front-proxy-ca" certificate and key
[certs] Generating "front-proxy-client" certificate and key
[certs] Generating "etcd/ca" certificate and key
[certs] Generating "etcd/server" certificate and key
[certs] etcd/server serving cert is signed for DNS names [k8s.master01 localhost] and IPs [10.69.10.110 127.0.0.1 ::1]
[certs] Generating "etcd/peer" certificate and key
[certs] etcd/peer serving cert is signed for DNS names [k8s.master01 localhost] and IPs [10.69.10.110 127.0.0.1 ::1]
[certs] Generating "etcd/healthcheck-client" certificate and key
[certs] Generating "apiserver-etcd-client" certificate and key
[certs] Generating "sa" key and public key
[kubeconfig] Using kubeconfig folder "/etc/kubernetes"
[kubeconfig] Writing "admin.conf" kubeconfig file
[kubeconfig] Writing "kubelet.conf" kubeconfig file
[kubeconfig] Writing "controller-manager.conf" kubeconfig file
[kubeconfig] Writing "scheduler.conf" kubeconfig file
[kubelet-start] Writing kubelet environment file with flags to file "/var/lib/kubelet/kubeadm-flags.env"
[kubelet-start] Writing kubelet configuration to file "/var/lib/kubelet/config.yaml"
[kubelet-start] Starting the kubelet
[control-plane] Using manifest folder "/etc/kubernetes/manifests"
[control-plane] Creating static Pod manifest for "kube-apiserver"
[control-plane] Creating static Pod manifest for "kube-controller-manager"
[control-plane] Creating static Pod manifest for "kube-scheduler"
[etcd] Creating static Pod manifest for local etcd in "/etc/kubernetes/manifests"
[wait-control-plane] Waiting for the kubelet to boot up the control plane as static Pods from directory "/etc/kubernetes/manifests". This can take up to 4m0s
[apiclient] All control plane components are healthy after 6.003566 seconds
[upload-config] Storing the configuration used in ConfigMap "kubeadm-config" in the "kube-system" Namespace
[kubelet] Creating a ConfigMap "kubelet-config" in namespace kube-system with the configuration for the kubelets in the cluster
[upload-certs] Skipping phase. Please see --upload-certs
[mark-control-plane] Marking the node k8s.master01 as control-plane by adding the labels: [node-role.kubernetes.io/control-plane node.kubernetes.io/exclude-from-external-load-balancers]
[mark-control-plane] Marking the node k8s.master01 as control-plane by adding the taints [node-role.kubernetes.io/control-plane:NoSchedule]
[bootstrap-token] Using token: webmas.terme01234567890
[bootstrap-token] Configuring bootstrap tokens, cluster-info ConfigMap, RBAC Roles
[bootstrap-token] Configured RBAC rules to allow Node Bootstrap tokens to get nodes
[bootstrap-token] Configured RBAC rules to allow Node Bootstrap tokens to post CSRs in order for nodes to get long term certificate credentials
[bootstrap-token] Configured RBAC rules to allow the csrapprover controller automatically approve CSRs from a Node Bootstrap Token
[bootstrap-token] Configured RBAC rules to allow certificate rotation for all node client certificates in the cluster
[bootstrap-token] Creating the "cluster-info" ConfigMap in the "kube-public" namespace
[kubelet-finalize] Updating "/etc/kubernetes/kubelet.conf" to point to a rotatable kubelet client certificate and key
[addons] Applied essential addon: CoreDNS
[addons] Applied essential addon: kube-proxy

Your Kubernetes control-plane has initialized successfully!

To start using your cluster, you need to run the following as a regular user:

  mkdir -p $HOME/.kube
  sudo cp -i /etc/kubernetes/admin.conf $HOME/.kube/config
  sudo chown $(id -u):$(id -g) $HOME/.kube/config

Alternatively, if you are the root user, you can run:

  export KUBECONFIG=/etc/kubernetes/admin.conf

You should now deploy a pod network to the cluster.
Run "kubectl apply -f [podnetwork].yaml" with one of the options listed at:
  https://kubernetes.io/docs/concepts/cluster-administration/addons/

Then you can join any number of worker nodes by running the following on each as root:

kubeadm join 10.69.10.110:6443 --token webmas.terme01234567890 \
	--discovery-token-ca-cert-hash sha256:f900d63d21d2fe77c7e696f070b5c8d6bf4e4dcdf0985b38ab66c044c9ae7cc2
上面的初始化输出内容包含以下关键内容:
[certs]生成相关的各种证书[kubeconfig]生成相关的kubeconfig文件[kubelet-start]生成kubelet的配置文件"/var/lib/kubelet/config.yaml"[control-plane]使用/etc/kubernetes/manifests目录中的yaml文件创建apiserver、controller-manager、scheduler的静态pod[bootstraptoken]生成token记录下来,后边使用kubeadm join往集群中添加节点时会用到[addons]安装基本插件:CoreDNS,kube-proxy
根据安装提示拷贝 kubeconfig 文件:
➜  ~ mkdir -p $HOME/.kube
➜  ~ sudo cp -i /etc/kubernetes/admin.conf $HOME/.kube/config
➜  ~ sudo chown $(id -u):$(id -g) $HOME/.kube/config
使用 kubectl 命令查看节点已经初始化成功了:
➜  ~ kubectl get nodes
NAME           STATUS     ROLES           AGE   VERSION
k8s.master01   NotReady   control-plane   53m   v1.27.4
但是节点状态是NotReady,我们来查看节点信息:
➜  ~ kubectl describe node k8s.master01
Name:               k8s.master01
Roles:              control-plane
Labels:             beta.kubernetes.io/arch=amd64
                    beta.kubernetes.io/os=linux
                    kubernetes.io/arch=amd64
                    kubernetes.io/hostname=k8s.master01
                    kubernetes.io/os=linux
                    node-role.kubernetes.io/control-plane=
                    node.kubernetes.io/exclude-from-external-load-balancers=
Annotations:        kubeadm.alpha.kubernetes.io/cri-socket: unix:///var/run/containerd/containerd.sock
                    node.alpha.kubernetes.io/ttl: 0
                    volumes.kubernetes.io/controller-managed-attach-detach: true
CreationTimestamp:  Fri, 28 Jul 2023 16:05:00 +0800
Taints:             node-role.kubernetes.io/control-plane:NoSchedule
                    node.kubernetes.io/not-ready:NoSchedule
Unschedulable:      false
Lease:
  HolderIdentity:  k8s.master01
  AcquireTime:
  RenewTime:       Fri, 28 Jul 2023 19:42:33 +0800
Conditions:
  Type             Status  LastHeartbeatTime                 LastTransitionTime                Reason                       Message
  ----             ------  -----------------                 ------------------                ------                       -------
  MemoryPressure   False   Fri, 28 Jul 2023 19:39:23 +0800   Fri, 28 Jul 2023 16:04:58 +0800   KubeletHasSufficientMemory   kubelet has sufficient memory available
  DiskPressure     False   Fri, 28 Jul 2023 19:39:23 +0800   Fri, 28 Jul 2023 16:04:58 +0800   KubeletHasNoDiskPressure     kubelet has no disk pressure
  PIDPressure      False   Fri, 28 Jul 2023 19:39:23 +0800   Fri, 28 Jul 2023 16:04:58 +0800   KubeletHasSufficientPID      kubelet has sufficient PID available
  Ready            False   Fri, 28 Jul 2023 19:39:23 +0800   Fri, 28 Jul 2023 16:04:58 +0800   KubeletNotReady              container runtime network not ready: NetworkReady=false reason:NetworkPluginNotReadymessage:Network plugin returns error: cni plugin not initialized
Addresses:
.................
看到原因是我们的cni插件还没有初始化,稍后我们来安装Calico组件解决。
安装Calico网络组件
安装Helm 3
Helm是Kubernetes的包管理器,我们使用Helm来安装Calico网络组件。在control-plane节点上安装helm:
➜  ~ curl -fsSL -o get_helm.sh https://raw.githubusercontent.com/helm/helm/main/scripts/get-helm-3
➜  ~ chmod 700 get_helm.sh
➜  ~ ./get_helm.sh
Downloading https://get.helm.sh/helm-v3.12.2-linux-amd64.tar.gz
Verifying checksum... Done.
Preparing to install helm into /usr/local/bin
helm installed into /usr/local/bin/helm
➜  ~ helm list
NAME	NAMESPACE	REVISION	UPDATED	STATUS	CHART	APP VERSION
使用helm在k8s集群中安装calico
官方不推荐手动二进制部署calico。这里使用 tigera operator 部署:
➜ ~ wget https://github.com/projectcalico/calico/releases/download/v3.26.1/tigera-operator-v3.26.1.tgz
定制的values.yaml如下:
➜  ~ cat > values.yaml <<EOF
apiServer:
  enabled: false
installation:
  kubeletVolumePluginPath: None
EOF
使用helm安装calico:
helm install calico tigera-operator-v3.26.0.tgz -n kube-system --create-namespace -f values.yaml
等待并确认所有pod处于Running状态:
kubectl get pod -n kube-system | grep tigera-operator
tigera-operator-5fb55776df-wxbph   1/1     Running   0             5m10s

kubectl get pods -n calico-system
NAME                                       READY   STATUS    RESTARTS   AGE
calico-kube-controllers-68884f975d-5d7p9   1/1     Running   0          5m24s
calico-node-twbdh                          1/1     Running   0          5m24s
calico-typha-7b4bdd99c5-ssdn2              1/1     Running   0          5m24s
再来查看节点状态,已经变成Ready了:
➜  ~ kubectl get nodes
NAME           STATUS   ROLES           AGE     VERSION
k8s.master01   Ready    control-plane   2d23h   v1.27.4
➜  ~ kubectl get pod -n kube-system
NAME                                   READY   STATUS    RESTARTS   AGE
coredns-5d78c9869d-4xpd9               1/1     Running   0          10m
coredns-5d78c9869d-d25dg               1/1     Running   0          10m
etcd-k8s.master01                      1/1     Running   0          10m
kube-apiserver-k8s.master01            1/1     Running   0          10m
kube-controller-manager-k8s.master01   1/1     Running   0          10m
kube-proxy-jgs5d                       1/1     Running   0          10m
kube-scheduler-k8s.master01            1/1     Running   0          10m
tigera-operator-5f4668786-62s2x        1/1     Running   0          1m
➜  ~ kubectl get pods -n calico-system
NAME                                       READY   STATUS    RESTARTS   AGE
calico-kube-controllers-548967f744-hx5j9   1/1     Running   0          1m
calico-node-xzd7b                          1/1     Running   0          1m
calico-typha-6bc5447f95-rtmf2              1/1     Running   0          1m
查看calico向k8s中添加的api资源:
➜  ~ kubectl api-resources | grep calico
bgpconfigurations                              crd.projectcalico.org/v1               false        BGPConfiguration
bgpfilters                                     crd.projectcalico.org/v1               false        BGPFilter
bgppeers                                       crd.projectcalico.org/v1               false        BGPPeer
blockaffinities                                crd.projectcalico.org/v1               false        BlockAffinity
caliconodestatuses                             crd.projectcalico.org/v1               false        CalicoNodeStatus
clusterinformations                            crd.projectcalico.org/v1               false        ClusterInformation
felixconfigurations                            crd.projectcalico.org/v1               false        FelixConfiguration
globalnetworkpolicies                          crd.projectcalico.org/v1               false        GlobalNetworkPolicy
globalnetworksets                              crd.projectcalico.org/v1               false        GlobalNetworkSet
hostendpoints                                  crd.projectcalico.org/v1               false        HostEndpoint
ipamblocks                                     crd.projectcalico.org/v1               false        IPAMBlock
ipamconfigs                                    crd.projectcalico.org/v1               false        IPAMConfig
ipamhandles                                    crd.projectcalico.org/v1               false        IPAMHandle
ippools                                        crd.projectcalico.org/v1               false        IPPool
ipreservations                                 crd.projectcalico.org/v1               false        IPReservation
kubecontrollersconfigurations                  crd.projectcalico.org/v1               false        KubeControllersConfiguration
networkpolicies                                crd.projectcalico.org/v1               true         NetworkPolicy
networksets                                    crd.projectcalico.org/v1               true         NetworkSet
这些api资源是属于calico的,因此不建议使用kubectl来管理,推荐按照calicoctl来管理这些api资源。 将calicoctl安装为kubectl的插件:
wget https://github.com/projectcalico/calico/releases/latest/download/calicoctl-linux-amd64 -O /usr/local/bin/kubectl-calico
chmod +x /usr/local/bin/kubectl-calico
# 验证插件正常工作:
kubectl calico -h
查看部署的kube-proxy的网络模式:
➜  ~ curl http://localhost:10249/proxyMode
ipvs
添加节点
将control-plane节点上面的 $HOME/.kube/config 文件拷贝到 node 节点对应的文件中,安装 kubeadm、kubelet、kubectl(可选),然后执行上面初始化完成后提示的 join 命令即可:
➜  ~ kubeadm join 10.69.10.110:6443 --token webmas.terme01234567890 \
	--discovery-token-ca-cert-hash sha256:f900d63d21d2fe77c7e696f070b5c8d6bf4e4dcdf0985b38ab66c044c9ae7cc2
如果加入节点的时候提示错误,或者忘记了上面的 join 命令和token,可以使用命令kubeadm token create --print-join-command 重新生成。
执行成功后运行 get nodes 命令:
➜  ~ kubectl get node
NAME           STATUS   ROLES           AGE    VERSION
k8s.master01   Ready    control-plane   3d2h   v1.27.4
k8s.node01     Ready              25s    v1.27.4
加入node节点后验证k8s DNS是否可用
➜  ~ kubectl run curl --image=radial/busyboxplus:curl -it
If you don't see a command prompt, try pressing enter.
[ root@curl:/ ]$ nslookup kubernetes.default
Server:    10.96.0.10
Address 1: 10.96.0.10 kube-dns.kube-system.svc.cluster.local

Name:      kubernetes.default
Address 1: 10.96.0.1 kubernetes.default.svc.cluster.local
使用Helm部署dashboard
Kubernetes Dashboard 支持基于 Helm 和 Manifest 的安装。 自发布v3.0.0之后,推荐使用Helm Chart方式安装,Helm方式会自动安装cert-manager、nginx-ingress-controller 和metrics-server 等依赖项,而不需要像之前的版本要手动一个个安装。
添加chart repo:
➜ ~ helm repo add kubernetes-dashboard https://kubernetes.github.io/dashboard/
部署dashboard并绑定域名,稍后我们使用域名kubernetes.dashboard.webmaster.me来访问dashboard:
➜  ~ helm upgrade --install kubernetes-dashboard kubernetes-dashboard/kubernetes-dashboard --create-namespace --namespace kubernetes-dashboard \
  --set=app.ingress.hosts="{localhost,kubernetes.dashboard.webmaster.me}"
Release "kubernetes-dashboard" has been upgraded. Happy Helming!
NAME: kubernetes-dashboard
LAST DEPLOYED: Mon Jul 31 21:19:11 2023
NAMESPACE: kubernetes-dashboard
STATUS: deployed
REVISION: 2
TEST SUITE: None
NOTES:
*************************************************************************************************
*** PLEASE BE PATIENT: Kubernetes Dashboard may need a few minutes to get up and become ready ***
*************************************************************************************************

Congratulations! You have just installed Kubernetes Dashboard in your cluster.

To access Dashboard run:
  kubectl -n kubernetes-dashboard port-forward svc/kubernetes-dashboard-nginx-controller 8443:443

NOTE: In case port-forward command does not work, make sure that nginx service name is correct.
      Check the services in Kubernetes Dashboard namespace using:
        kubectl -n kubernetes-dashboard get svc

Dashboard will be available at:
  https://localhost:8443

Looks like you are deploying Kubernetes Dashboard on a custom domain(s).
Please make sure that the ingress configuration is valid.
Dashboard should be accessible on your configured domain(s) soon:
  - https://kubernetes.dashboard.webmaster.me

NOTE: It may take a few minutes for the Ingress IP/Domain to be available.
      It does not apply to local dev Kubernetes installations such as kind, etc.
      You can watch the status using:
        kubectl -n kubernetes-dashboard get ing kubernetes-dashboard -w
如果安装的时候提示Internal error occurred: failed calling webhook "webhook.cert-manager.io": failed to call webhook: Post...不用担心,等两分钟之后再执行一次命令就好了。
为了能从宿主机使用域名kubernetes.dashboard.webmaster.me访问dashboard,将nginx-controller的hostNetwork改为true:
➜  ~ kubectl -n kubernetes-dashboard edit deployment kubernetes-dashboard-nginx-controller
apiVersion: apps/v1
kind: Deployment
metadata:
  ...............
  template:
   ........
   spec:
     .......
     hostNetwork: true
配置hosts:
➜  ~ cat >> /etc/hosts <<EOF
10.69.10.110  kubernetes.dashboard.webmaster.me
EOF
创建用户账号:
➜  ~ kubectl create serviceaccount kube-dashboard-admin-sa -n kubernetes-dashboard
serviceaccount/kube-dashboard-admin-sa created
➜  ~ kubectl create clusterrolebinding kube-dashboard-admin-sa \
--clusterrole=cluster-admin --serviceaccount=kubernetes-dashboard:kube-dashboard-admin-sa
clusterrolebinding.rbac.authorization.k8s.io/kube-dashboard-admin-sa created
➜  ~ kubectl create token kube-dashboard-admin-sa -n kubernetes-dashboard --duration=87600h
eyJhbGciOiJSUzI1NiIsImtpZCI6IndWRE9xYm55UTA3akE0T2tVZVE1N0lSSVdBa0ZTbjhNVExRTGpJaEMyanMifQ.eyJhdWQiOlsiaHR0cHM6Ly9rdWJlcm5ldGVzLmRlZmF1bHQuc3ZjLmNsdXN0ZXIubG9jYWwiXSwiZXhwIjoyMDA2MTY5NzQxLCJpYXQiOjE2OTA4MDk3NDEsImlzcyI6Imh0dHBzOi8va3ViZXJuZXRlcy5kZWZhdWx0LnN2Yy5jbHVzdGVyLmxvY2FsIiwia3ViZXJuZXRlcy5pbyI6eyJuYW1lc3BhY2UiOiJrdWJlcm5ldGVzLWRhc2hib2FyZCIsInNlcnZpY2VhY2NvdW50Ijp7Im5hbWUiOiJrdWJlLWRhc2hib2FyZC1hZG1pbi1zYSIsInVpZCI6IjU3ZmVhMTJjLTc5YWItNGQ4NC1iYWFhLWFhZjA3ZWM3ZmZkNiJ9fSwibmJmIjoxNjkwODA5NzQxLCJzdWIiOiJzeXN0ZW06c2VydmljZWFjY291bnQ6a3ViZXJuZXRlcy1kYXNoYm9hcmQ6a3ViZS1kYXNoYm9hcmQtYWRtaW4tc2EifQ.Mx56DmILplz_jaoacj-BtOX-w9C7BNzw84XfZF9XIgUrO-Z2XYN3zDvKFlkoAq-MPfqSqIi-Etti7R7gGHDGdSWktDs8lK5avnfWUUCw9hleRKe7oMY1P9yI1V7eyA14LEvOxEcgcAjNV8iIbUHAPPG545OJoGLPxy7ZTyxS4mtxZ_nTTIiiNn33Erji9xAwiRxNkaPZyhPHKo9uuGHvnhe2LVnExo2usfX4N7xiwdyXGlkoEOzz4Fd9XsqgMADiqBFa9nTE4sE3qp347n6TiN5oS_O-AhLfnM8T4dsoLRc39BDq8DZfC6asyHhQxZRmCSqiFoR89gGdEPDS594llA
查看安装的服务:
➜  ~ kubectl -n kubernetes-dashboard get svc
NAME                                              TYPE           CLUSTER-IP      EXTERNAL-IP   PORT(S)                      AGE
kubernetes-dashboard-api                          ClusterIP      10.97.53.219            9000/TCP                     5m17s
kubernetes-dashboard-cert-manager                 ClusterIP      10.99.19.239            9402/TCP                     5m17s
kubernetes-dashboard-cert-manager-webhook         ClusterIP      10.101.1.123            443/TCP                      5m17s
kubernetes-dashboard-metrics-scraper              ClusterIP      10.98.47.180            8000/TCP                     5m17s
kubernetes-dashboard-metrics-server               ClusterIP      10.98.19.94             443/TCP                      5m17s
kubernetes-dashboard-nginx-controller             LoadBalancer   10.109.237.11        80:32560/TCP,443:32405/TCP   5m17s
kubernetes-dashboard-nginx-controller-admission   ClusterIP      10.99.62.233            443/TCP                      5m17s
kubernetes-dashboard-web                          ClusterIP      10.108.45.169           8000/TCP                     5m17s
从服务列表里看到kubernetes-dashboard-nginx-controller的web端口是32405。使用浏览器访问https://kubernetes.dashboard.webmaster.me:32405 :
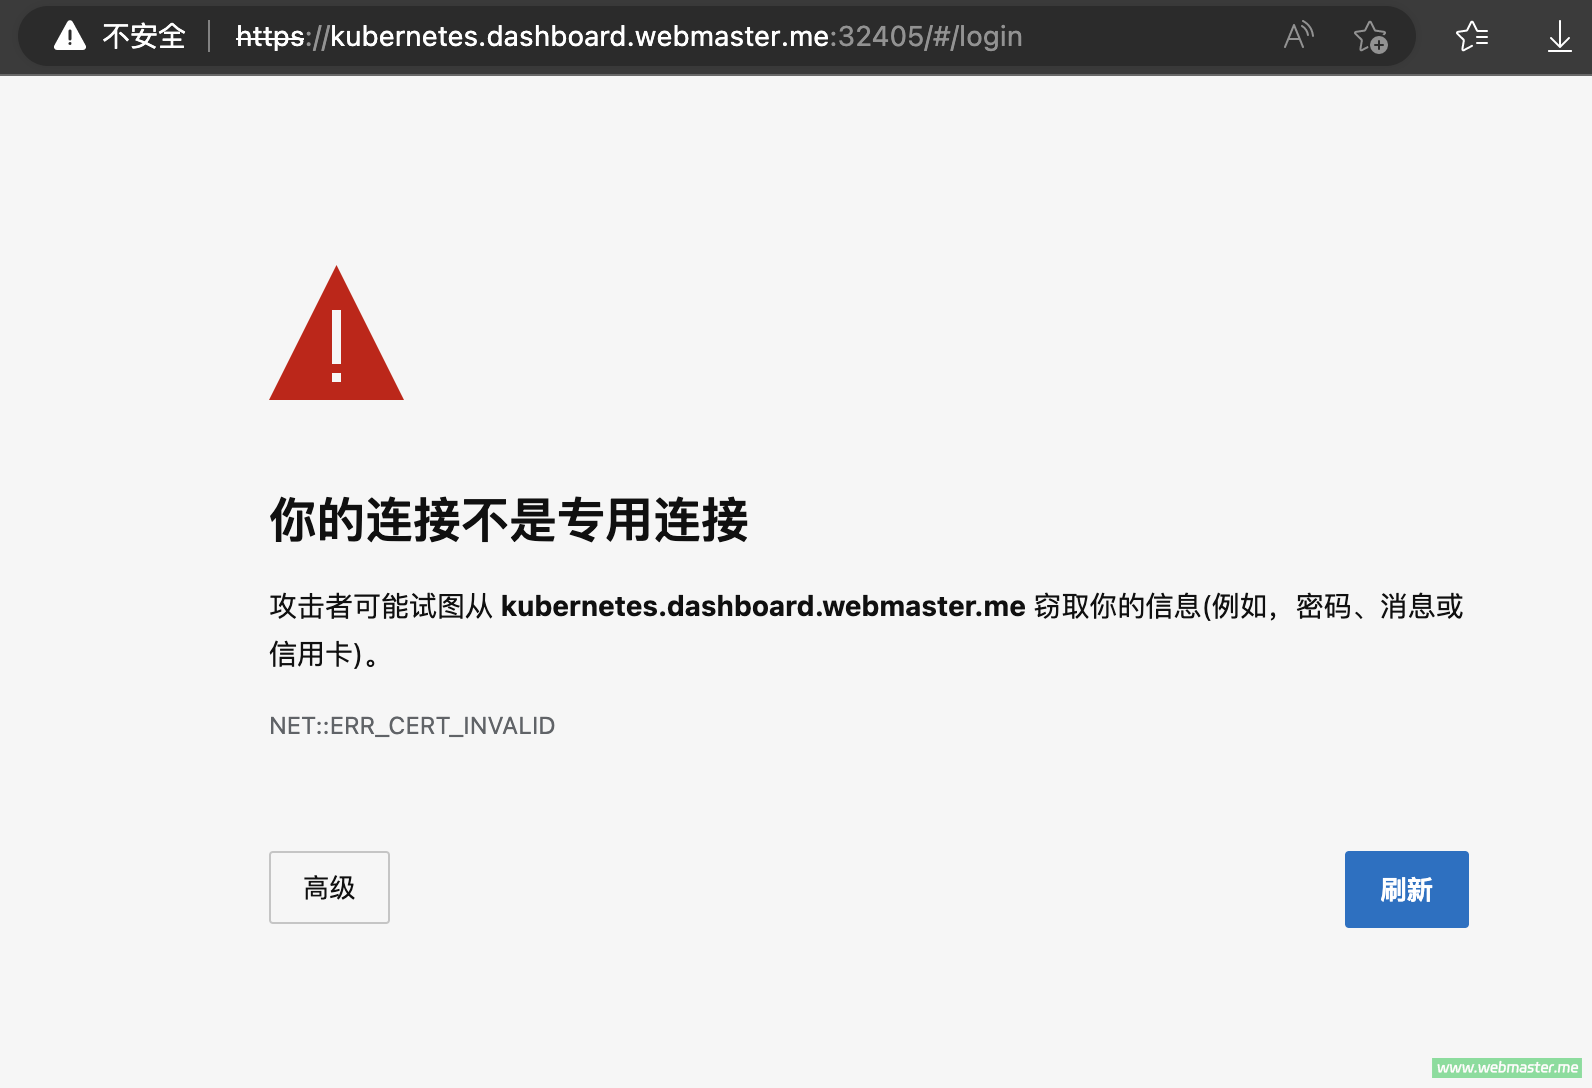
选择“高级”,然后点击“继续前往kubernetes.dashboard.webmaster.me(不安全)”进入,如果没有进入的链接,则用键盘输入“thisisunsafe” 即可正常进入。
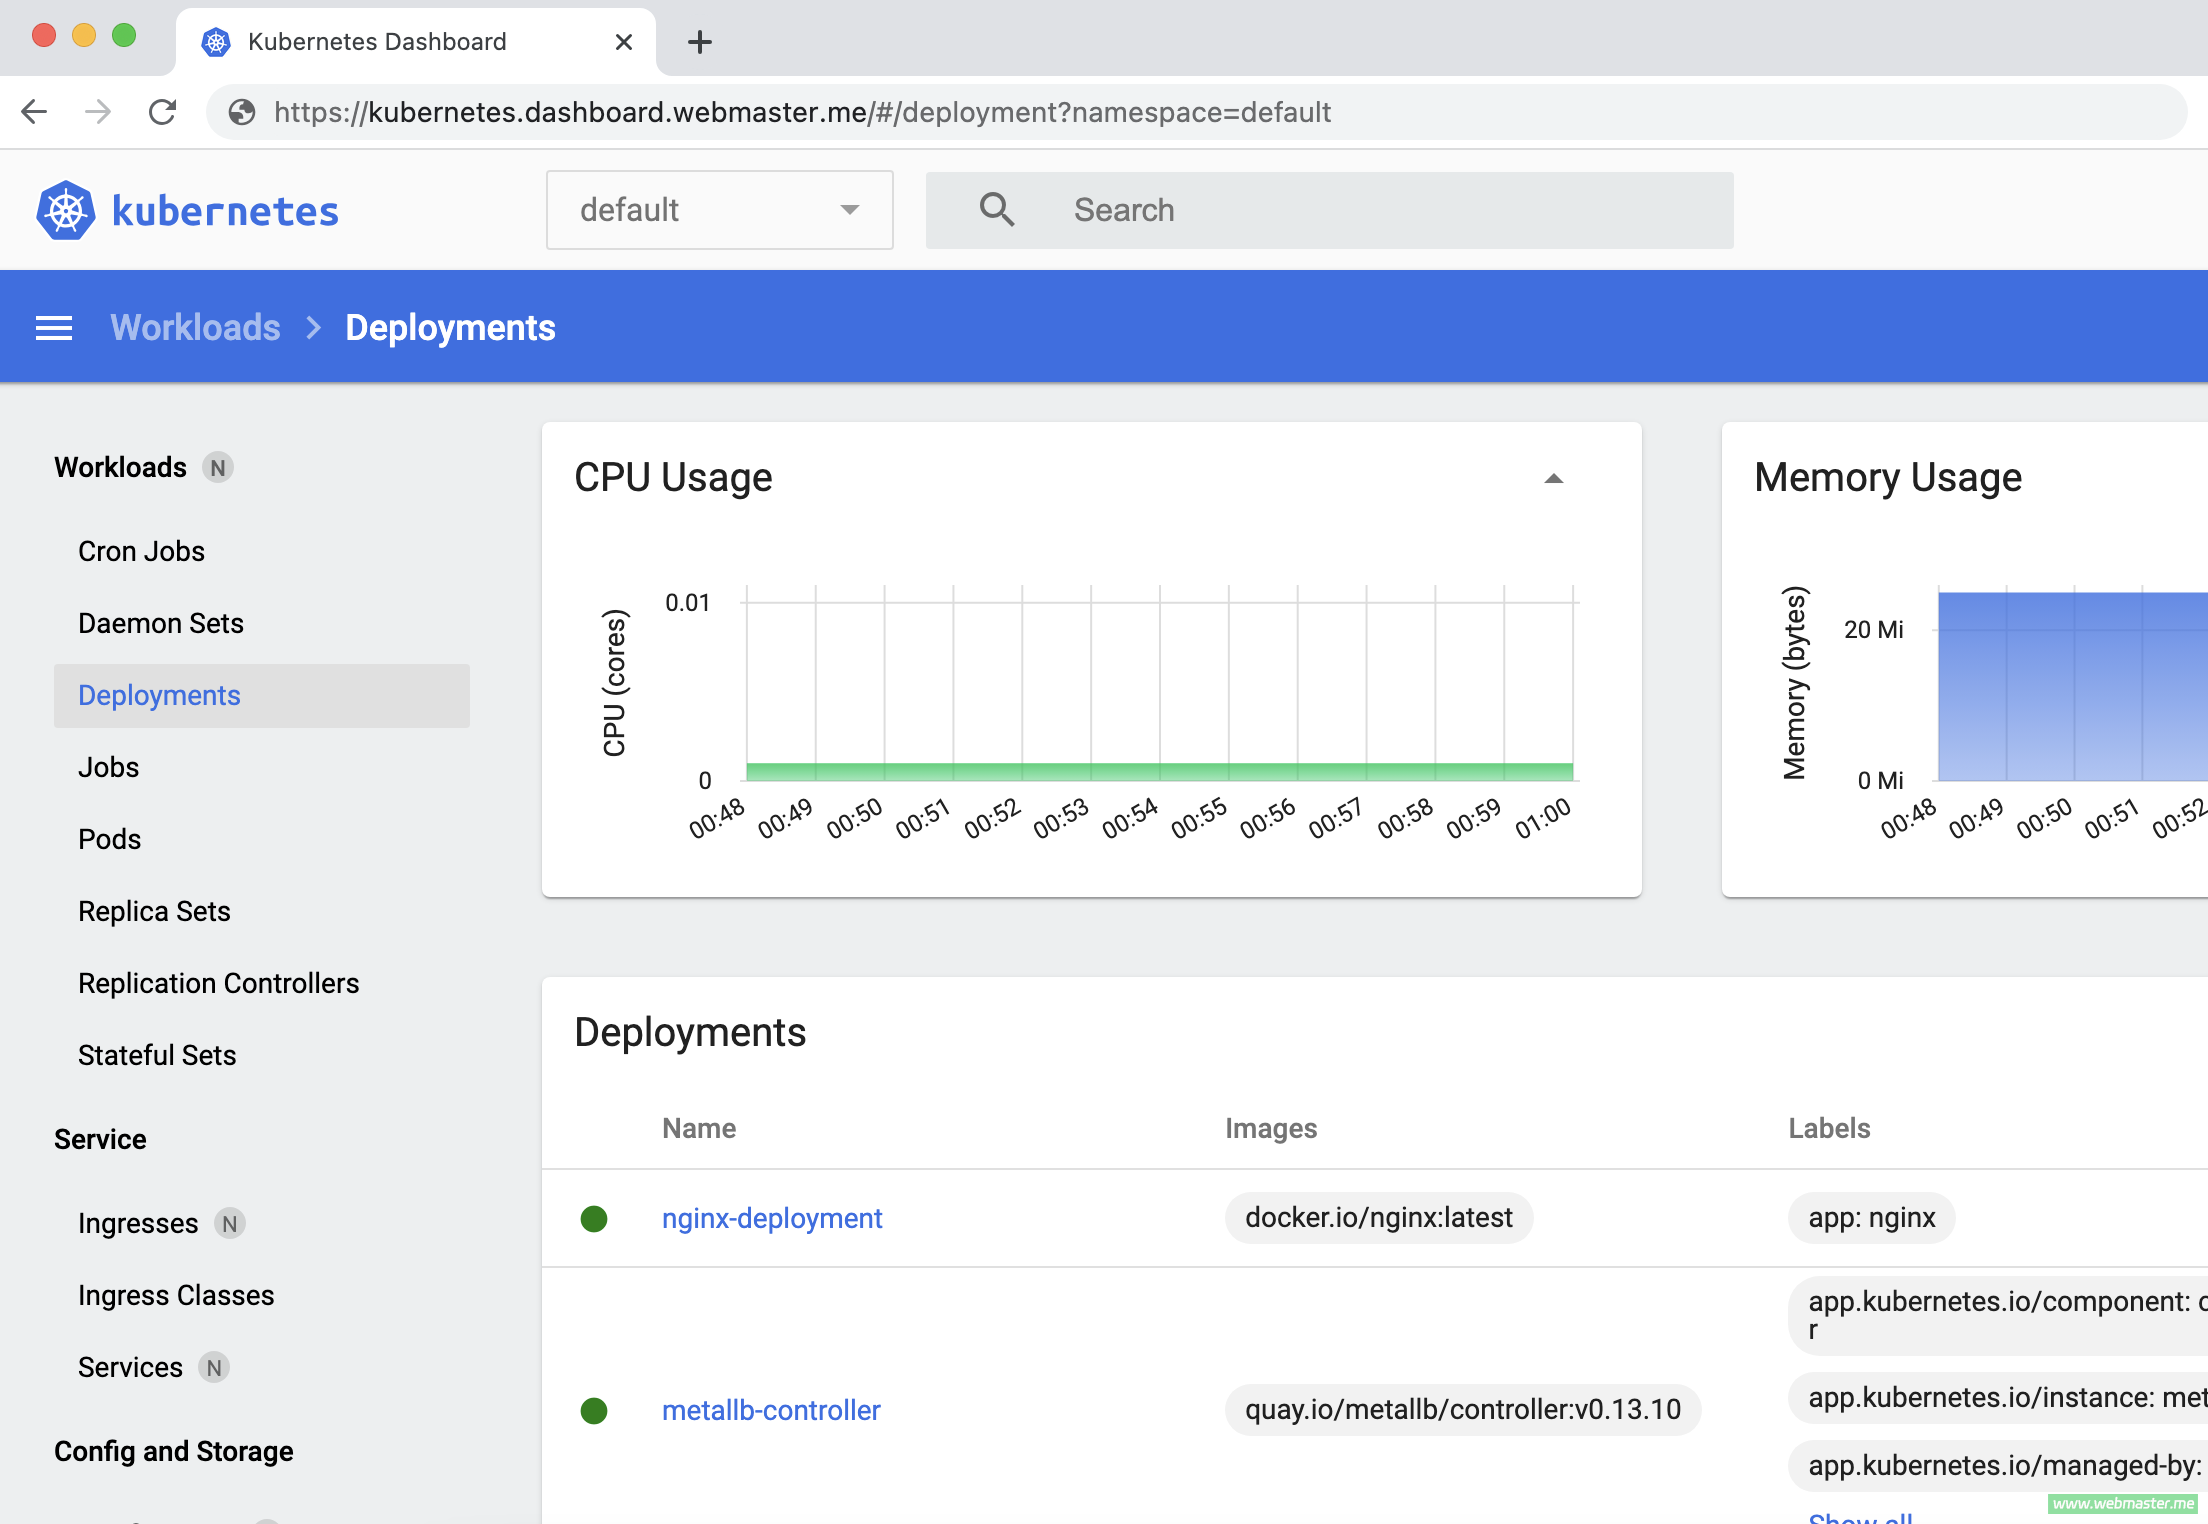
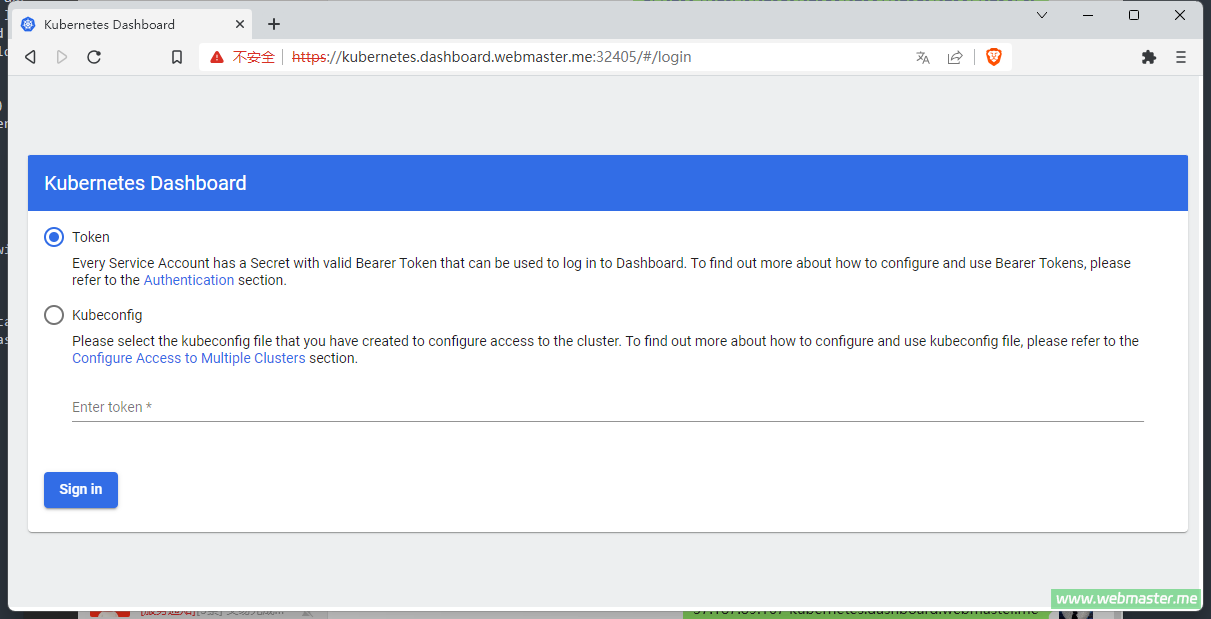
将上面生成的字符串作为 token 登录控制面板:
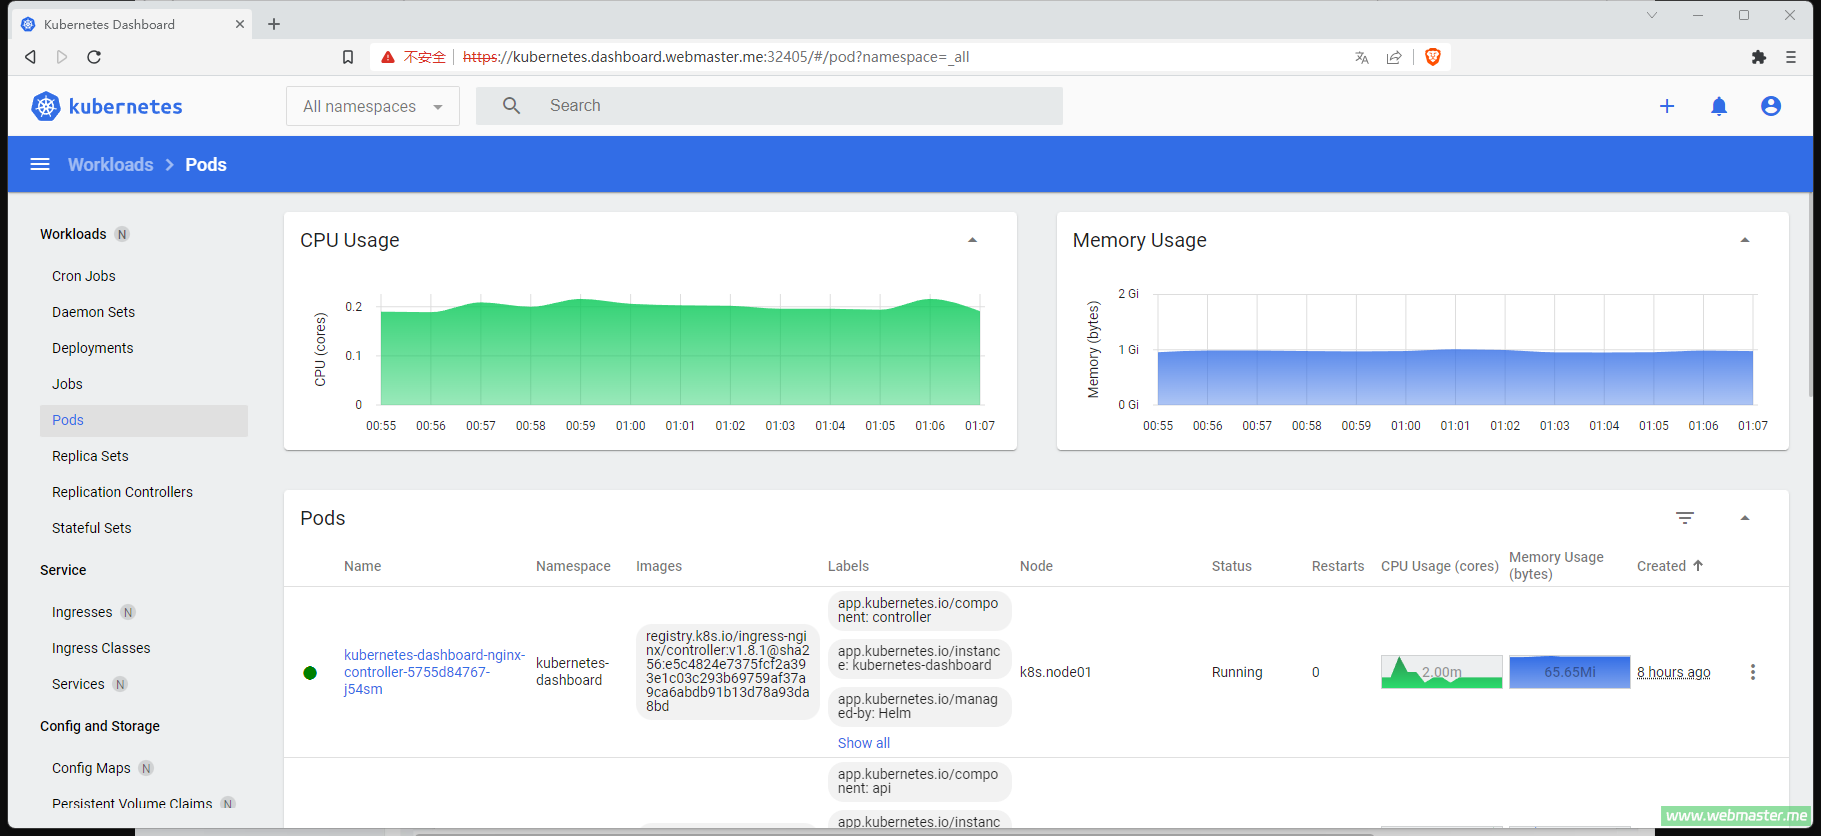
现在我们就完成了使用 kubeadm 在龙蜥(Anolis) OS 8上搭建 v1.27.4 版本的 kubernetes 集群。
© 版权声明
文章版权归作者所有,未经允许请勿转载。
相关文章

暂无评论...
 热点
热点